 Blaine Siding
 A Different Kind of Exposure Than the Waterfront
Dakota Creek sits back from Blaine's open shoreline, and that changes the conversation about siding before a single panel goes up. Homes along this corridor tend to sit among mature trees, on lots that back up to the creek itself or to the wooded and wetland buffers that run alongside it. That setting brings real advantages — more shade, more privacy, less direct wind loading than a house standing exposed on the water. But it trades one set of problems for another. Where a waterfront home in Blaine deals mostly with wind-driven rain and constant salt exposure, a Dakota Creek property deals with shade that never fully dries, tree debris that collects in valleys and against trim, and humidity that lingers near the creek corridor long after a storm has passed through the rest of Whatcom County.
This page is about siding installation specifically for homes in and around Dakota Creek — new siding and full re-sides, not spot repair — and what a correct job looks like given how this particular stretch of the Blaine area behaves. We install James Hardie fiber cement exclusively, and everything below is written around that system, since it's the only one we put on homes in this area.
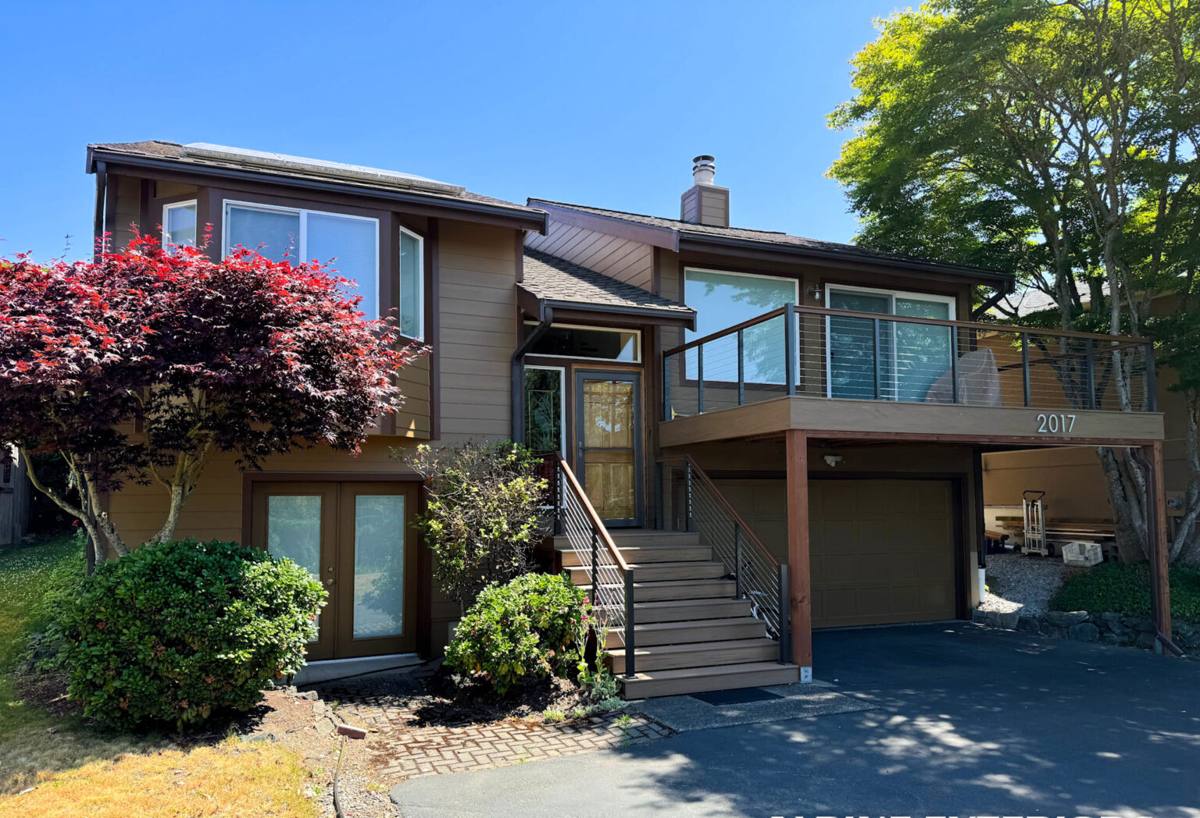
What Dakota Creek's Setting Actually Does to a Wall
Shade That Slows Drying
Tree canopy is the defining feature of most Dakota Creek properties, and it does more than block sun. Walls that sit in near-constant shade take longer to dry out after every rain, and in this part of Whatcom County that can mean a wall staying damp for days at a stretch rather than hours. Siding material matters here, but installation detail — how much of a gap exists behind the panels, whether water can actually drain and airflow can actually move — matters just as much.
Salt Air Still Reaches This Far
Dakota Creek isn't waterfront, but it's still only a short distance from Blaine's shoreline, and salt-laden air doesn't stop at a property line. It arrives lighter here than it does on a house facing open water, but it's still present, and over years it still affects unprotected fasteners and hardware. Treating a Dakota Creek installation as if it were fully inland and salt-free is a mistake we don't make.
Driving Rain Funneled by Terrain and Trees
Wind-driven rain across this part of Whatcom County doesn't always hit a wall head-on — tree lines and the shape of the creek corridor itself can funnel and redirect it, so water sometimes hits a wall from an angle a homeowner wouldn't expect based on the house's orientation alone. That makes flashing and water-resistive barrier work at every window, door, and penetration just as important here as on a home facing the water directly.
A Moss Season That Runs Longer in the Shade
Every home in this region deals with a long moss season, but shaded, creek-adjacent lots see it run longer and start earlier than sunnier properties nearby. Moss and algae need moisture and low light to take hold, and Dakota Creek supplies both in abundance for much of the year. Installation choices that affect how quickly a wall dries — clearance, drainage detailing, airflow behind the siding — do more to control moss growth here than any cleaning product applied after the fact.
Why We Install James Hardie Fiber Cement Here — and Nothing Else
We don't install vinyl, LP SmartSide, primed spruce, cedar, or other fiber cement brands, and Dakota Creek's damp, shaded conditions are a good illustration of why. Vinyl can warp and doesn't stand up well to sustained moisture cycling. Wood-based products, whether solid wood or engineered, are the most vulnerable to the kind of prolonged dampness a shaded creek-side wall experiences, since their core material is what the moisture is trying to get at in the first place. James Hardie's fiber cement is non-combustible and doesn't rely on a resin-treated wood substrate, so extended damp exposure doesn't threaten the material the way it does with wood-based siding. Hardie also builds its HZ5 formulation specifically for regions with significant moisture exposure and freeze-thaw cycling, which describes this part of Whatcom County well, shaded lots included. Paired with a factory-applied ColorPlus finish, that gives a Dakota Creek home a wall system built for the conditions it actually faces, backed by a transferable warranty that depends on correct installation — which is the other half of getting this right.
What a Correct Installation Involves on a Shaded, Creek-Adjacent Lot
Rainscreen and Drainage Detail Behind the Panels
On a wall that dries slowly to begin with, the gap and drainage path behind the siding matters more than it would on a sun-exposed wall elsewhere. Correct rainscreen or drainage-plane detailing gives incidental moisture somewhere to go and lets air move behind the panels, which is what actually shortens how long a wall stays wet after a rain — not the paint color or panel style.
Fastening and Spacing to Manufacturer Spec
James Hardie publishes exact fastener type, spacing, and placement requirements by product line and exposure. Following that spec fully, including corrosion-resistant hardware given the residual salt exposure this area still sees, is what keeps the installation both structurally sound and within warranty.
Clearance at Grade and Landscaping
Wooded, creek-adjacent lots often have more organic groundcover — leaf litter, needle drop, mulch beds — built up against the foundation than a typical suburban lot. Hardie's minimum clearance requirements between siding and grade exist to keep the bottom edge of the panels out of standing moisture and debris buildup, and that clearance needs to be respected even where landscaping wants to creep up the wall over time.
Flashing at Every Penetration
Windows, doors, vents, and any spot where water may be funneled at an angle by nearby trees or terrain all need flashing that's actually lapped correctly, not just caulked over. This is the least visible part of the job and the part most likely to cause a hidden problem years later if it's rushed.
Sealed Field Cuts
Every panel cut on site — around a window, at a corner, at a fascia line — needs its cut edge sealed or primed per Hardie's specification before installation continues. On a wall that stays damp longer than most, an unsealed cut edge is exactly where localized moisture problems start.
Installation Shortcuts and How They Show Up on a Dakota Creek Home
| Shortcut | What it looks like on install day | How it shows up later here |
|---|---|---|
| No real drainage gap behind the panels | Siding looks tight and well-fitted | Slower drying, persistent dampness, and earlier moss growth on shaded walls |
| Standard-grade fasteners | No visible difference | Corrosion and loosened panels over time from residual salt air |
| Clearance buried by landscaping or debris | Looks tidy and finished | Wicking and paint failure at the bottom courses where organic material holds moisture against the wall |
| Flashing caulked instead of properly lapped | Appears sealed from outside | Hidden moisture intrusion, often from an unexpected wind angle funneled by trees or terrain |
| Unsealed field-cut edges | Cuts look clean and painted | Localized swelling at the cut, worsened by how long the wall stays damp |
How We Approach a Dakota Creek Installation
Reading the Lot Before Estimating
Before pricing anything, we walk the property and note which walls sit in near-constant shade, whether tree cover or terrain is likely to funnel wind-driven rain onto a particular elevation, and whether drainage around the foundation already shows signs of standing water or chronic dampness. That assessment shapes the installation plan more than the square footage does.
Tear-Off and an Honest Look at the Sheathing
Old siding comes off and we check the sheathing underneath before anything new goes up. On a home that's sat in extended shade for years, this is where we find out whether past moisture has already reached the wall assembly, and we'd rather address it now than install new siding over a hidden problem.
Weather Barrier and Drainage Plane
The water-resistive barrier goes on with full overlap and taped seams, and the drainage plane behind the future siding gets built out deliberately rather than treated as an afterthought, given how much drying performance depends on it here.
Installation to Manufacturer Spec
Panels go up following Hardie's fastening, spacing, and clearance requirements as the baseline for every job, with field cuts sealed as they're made.
Final Walkthrough
We walk the finished job with the homeowner and talk through what ongoing maintenance looks like on a shaded, creek-adjacent property specifically — things like keeping debris cleared from the base of the walls, which matter more here than on a more open lot.
Access, Timeline, and Cost Factors Specific to This Area
Every estimate is built around the specific house, but a few factors come up consistently on Dakota Creek projects:
| Factor | Why it matters here |
|---|---|
| Tree cover and canopy trimming | Some jobs need branches cleared back before staging and material handling can happen safely |
| Site access on wooded or rural lots | Longer driveways and tighter clearances can affect how equipment and material get to the house |
| Proximity to the creek or a wetland buffer | Properties bordering a stream or wetland buffer may need county setback rules confirmed before work begins |
| Sheathing condition after years of shade | Extended damp exposure found during tear-off can add repair scope before new siding goes up |
| Product line and finish selection | James Hardie offers multiple panel styles, textures, and ColorPlus finishes at different price points |
Where a lot borders Dakota Creek directly or sits within a mapped wetland buffer, we confirm any applicable county setback or critical-area requirements before work starts rather than assuming a standard residential permit covers everything — it's a step worth building into the schedule up front instead of discovering it midway through a job.
A Checklist for a Correct Installation on a Shaded, Creek-Side Lot
Whether it's our estimate or a second opinion you're weighing, these are worth confirming before calling a Dakota Creek installation finished:
- A real drainage gap or rainscreen behind the siding, not panels installed flat against the barrier
- Corrosion-resistant fasteners and hardware, even though the lot isn't waterfront
- Documented clearance between the bottom of the siding and grade, kept clear of landscaping and debris buildup
- Flashing properly lapped, not just caulked, at every window, door, and penetration
- All field-cut edges sealed or primed before installation continued
- Confirmation of any creek or wetland buffer setback requirements before work began
- A final walkthrough covering maintenance specific to a shaded, tree-covered property
Why Local Experience With This Corridor Matters
A crew that installs siding across Blaine and greater Whatcom County regularly learns something a one-off visiting contractor doesn't: that a wooded, creek-adjacent property demands a different set of judgment calls than a waterfront lot a mile away, even though both are technically in the same town. Knowing where to prioritize drainage detail over wind bracing, which walls on a shaded lot need the most attention to airflow, and when a setback near the creek needs to be checked before work starts — that comes from having done this work on this corridor before, not from a generic installation checklist applied the same way on every job.
If you're planning new siding for a home near Dakota Creek, or want a straightforward second opinion on an existing installation, we're glad to take a look. Reach out using the form below for a free, no-pressure estimate.